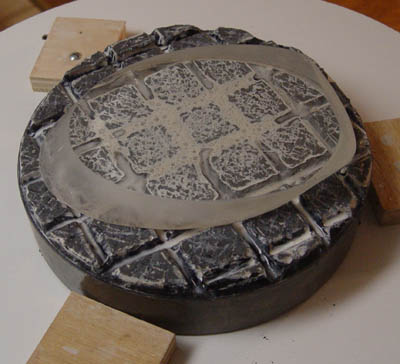
A Tale of Four Flats
 If only flat making
was as easy as using the item pictured to the right here....
If only flat making
was as easy as using the item pictured to the right here....
If you've been through the telescope section of my web page, you've
probably read about our 30" F/3.8 scope. The primary is in good
shape, but
after using the scope a few times we discovered that the secondary
mirror (flat #1)
was introducing astigmatism. Mike Conron made the secondary - he
did
a wonderful job - he cored it from a 10" blank, ground and polished and
figured
it according to a borrowed reference flat (flat #2). The
astigmatism was
evidence
that the "reference flat" did not deserve to be called that (it wasn't
flat).
Recently, I bought a surplus 10" reference flat (flat #3). We
tested it
against several other surfaces, and confirmed that it was indeed quite
flat on BOTH sides, confirming the documentation that came with it.
I decided to refigure one 10" pyrex flat (flat #4) against my
reference
flat. Then I could use it for pressing to press a lap to work on
the 5.5" minor-axis diagonal mirror and fix it.
10" Pyrex Flat Refigure
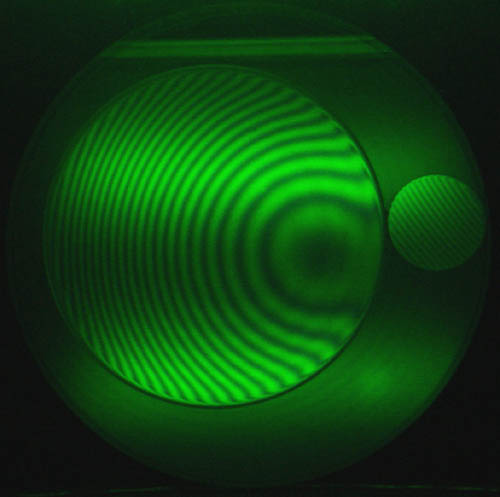
First, we checked the figure of the other "reference flat", which was
7" in
diameter and made of fused quartz. A photograph of it under test,
along
with a smaller 2" flat, sitting on my flat, is shown below on the left.
(The
2" flat had just been cleaned and handled, which is why its fringes
were
curved, due to thermal distortion.)
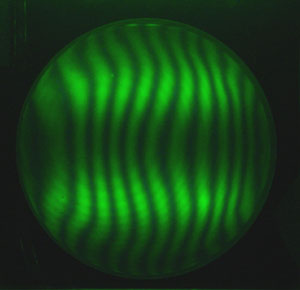
Additionally, a test of the 10" Pyrex mirror that was used in the
figuring of the diagonal revealed about 12 fringes of concavity (!),
pictured below at right (smaller photo). This 10" mirror mated
with the 6-7 fringe-convex 7" "reference flat", producing fairly
straight fringes. Unfortunately neither is flat.
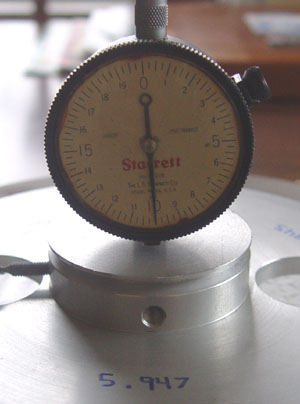
These pieces were so far from flat that careful work with a modest
spherometer could easily show the deviation from a flat surface.
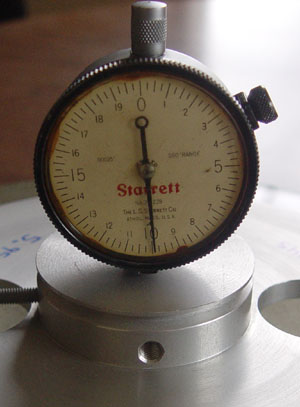
Here are the spherometer readings for my 10" reference flat, the 10"
Pyrex mirror (12 fringes concave) and another 10" surface that I
intended to use to grind against the Pyrex mirror to flatten it.
Note the needle centered on the 10 index in the first photo, and
reading 9.8 and 9.7 respectively in the next two photos. This
indicates concavity. (While the accuracy of the indicator is
admittedly not perfect, the relative readings were more consistent than
I expected.)

Due to the departure from flatness, I decided to go back to 12 micron
and grind the 10" Pyrex mirror flatter against another 10" Pyrex blank.
The
third surface, intended for grinding against the bad 10" Pyrex flat,
was
slightly more concave than the bad flat, as shown in the spherometer
readings
above. So, grinding the two together should make them both
reasonably
flat, and this of course could be adjusted during grinding to make them
both as flat as possible.
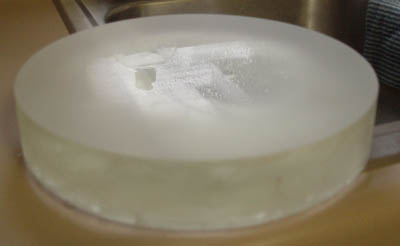
The picture below shows the polishing still remaining in the center of
the 10" Pyrex mirror surface after 20 minutes of grinding with 12
micron..
An hour gave a good uniform surface grind on both blanks, and then
about 45 minutes at 5 micron produced reasonably flat, ready to polish
surfaces. The positions of the pieces were adjusted to further
refine the flatness.
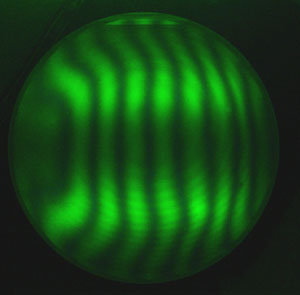
Below several pictures of the fringes at various stages in the
refiguring are shown. Polishing produced a somewhat concave 10"
mirror, and that was removed and the figure refined. At the end,
a fairly good 10"
flat was obtained, not perfect at the edge. Tool on top polishing
was used to remove the concavity, and the stubborn raised edge was
worked
down with a small local polisher and the full-sized lap. Lots of
pressing
is important in such work.
All in all, a successful refiguring. And now we have a good
surface to press a lap against for the refiguring of the 30" diagonal
mirror. (I
prefer not to press laps against nice reference flats that I have
purchased!)
Refiguring a 5.5" minor-axis secondary mirror
Careful work is required so that the edge of such an elliptical
secondary mirror is not turned. Pressing the lap on a known good
flat will help minimize this, and avoiding touching the edges
(especially on smaller flats) is advisable.
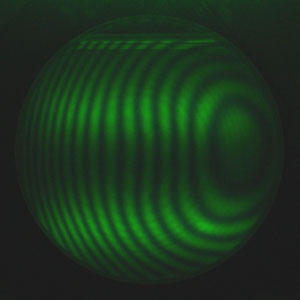
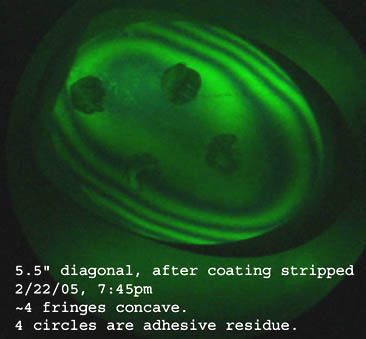
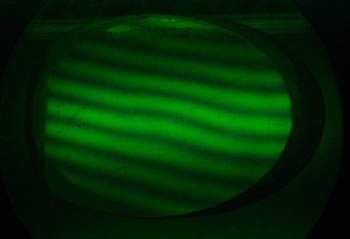
Here's a picture of the diagonal mirror before refiguring, under test
on my 10" reference flat. The mirror is approximately 4 fringes
concave, with many of the fringes bunched up at the edge, indicating a
severe slope error in the outer areas of the mirror. The picture
on the right is
of the mirror sitting on top of the 10" lap that was used to refigure
it.
(This lap was first used to make the 10" Pyrex flat described
above.)
Refiguring was accomplished by polishing the mirror on the lap with
strokes
of varying length and width. Care was taken not to heat up the
mirror
with heat from my hands, and pressure was kept light. Longer
strokes
lead to a more concave mirror, shorter to a more convex mirror, but
things
can act a little differently on the major and minor axes given the
strange
dimensions of the mirror.
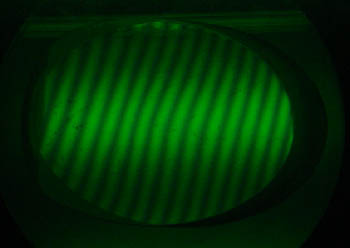
The concavity pictured above is astigmatic - the fringes follow the
elliptical
shape of the mirror. This shape gave way to overall convexity,
but
of the non-astigmatic type, with nice round fringes. From here,
the
mirror was gradually worked back to somewhat concave, and then flat
over
the course of about 10 figuring sessions.
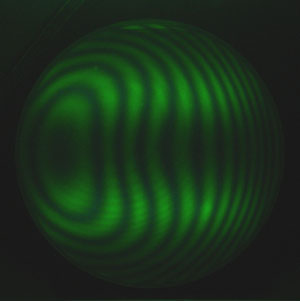
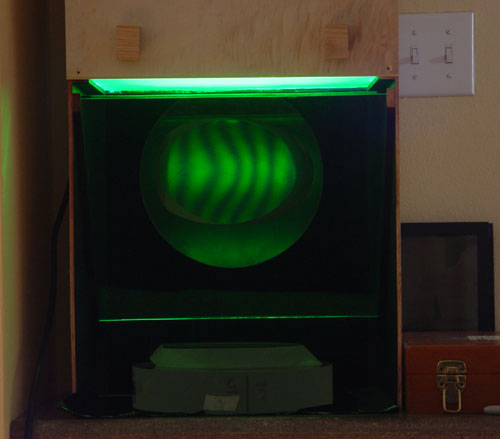
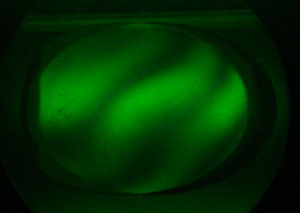
Here are pictures of the mirror and test setup in the midst of
refiguring,
and of a test where very few fringes are visible, and the test is quite
sensitive.
Both pictures show concavity in the center of the mirror.
The
test setup is my interference
tester
with a new light source - two 8-watt black lights (F8T5-BL - black
lights without the normal blue filters
on
the glass) shining through a green filter (Lee Filters - I'll check the
number) to isolate the 546 nm emission line. I like this setup -
the lights don't get hot, and I can leave it on for long periods of
time without cooking the ballasts or using much power.
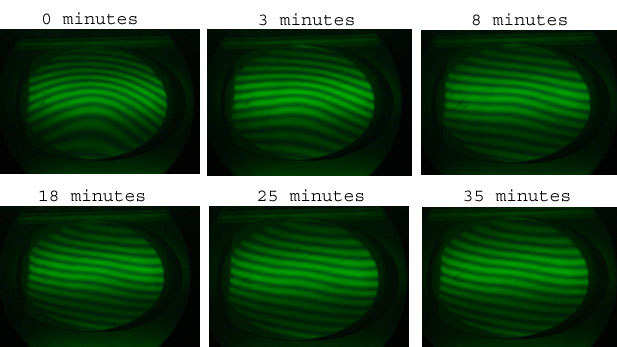
Testing this mirror revealed interesting cooling characteristics.
For
the scope (30" F/3.8) the cooling of a diagonal is nothing compared to
the
2.125" thick primary, but it's still interesting to watch. Below
is
a collection of six photos taken at various times after the mirror was
worked,
rinsed and dried. It appears the figure stabilizes fairly well
after
30 minutes. The figure goes from about two fringes of curvature
(1
wave on the glass) to less than 1/4 fringe (1/8th wave on the glass)
after
35 minutes. There is a slight depression in the center of the
mirror.
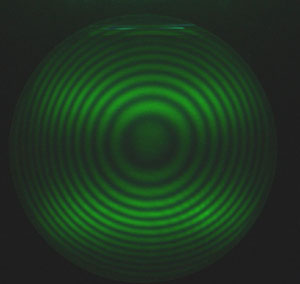
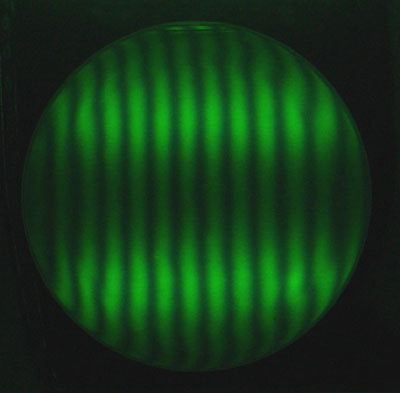
Here are the final fringe photos of the finished mirror. The
surface
is quite smooth. There is a very slight depression in the center,
but
I'm not going to risk the rest of the figure to remove it. It's a
whopping
1/10th wave deep. Can't wait to look at Jupiter and Saturn with
our
"new" scope!
After making the two flats this February and washing/drying my hands
countless
times, I will be using these:

Now it's time to finish the folding flat for my travel scope....