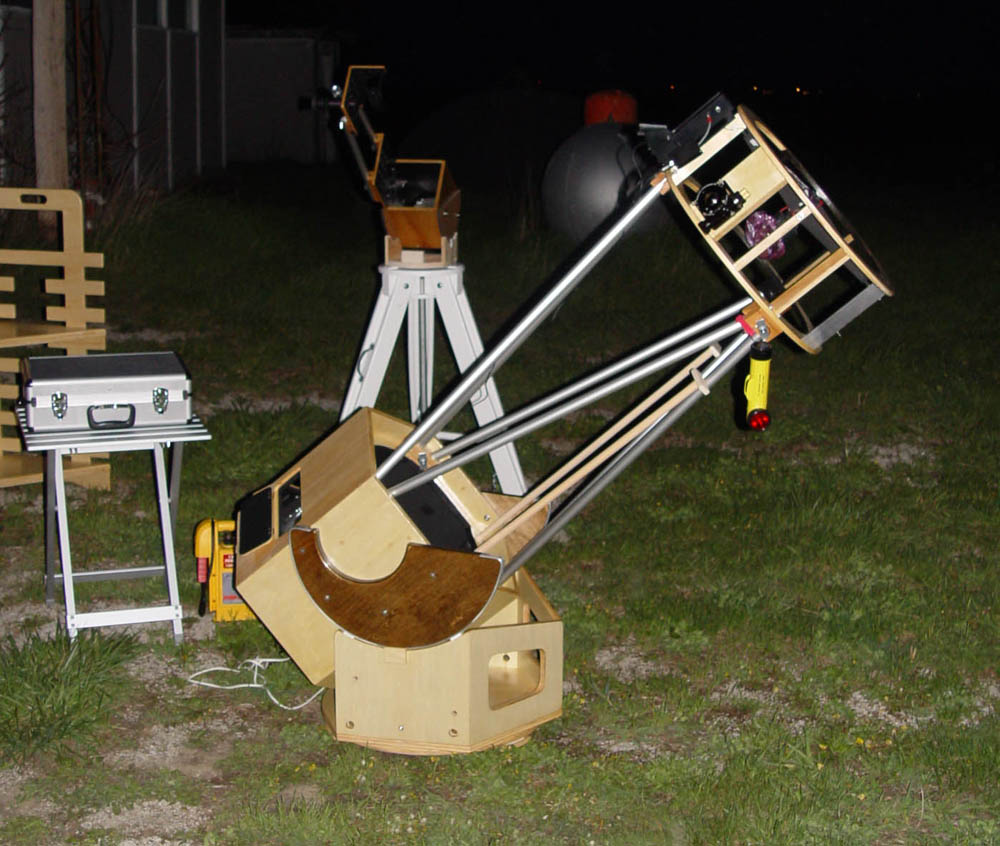
16" F/4 "Hex Scope"
Well, after completing three scopes under 10" in aperture, I had to
have a "large" telescope. I was offerred a 16" F/4 pregenerated
blank
for a good price, so I started grinding. The mirror was finished
in November, 2003, and first light was in December on a very cold
evening
with snow on the ground. The Orion Nebula looked fantastic, and
Saturn,
viewed low in the east through unstable air, offerred hints of the
subtle
details that would be revealed by this mirror that has turned out to be
excellent. When I want to do planetary obseving, this is my go to
scope!
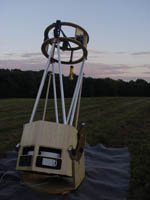
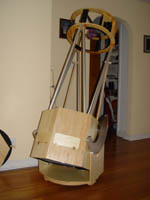
Here it is, ready to observe in Allerton Park near Monticello IL, ready
for observing at another site (with my travel scope in the background),
and set up in my living room.

This scope's unique feature is it's shape - the mirror box and rocker
box are hexagonal. This makes attaching the mirror cell and the
6-pole truss tubes easier, and makes the mirror box take up less space
than a square version. It's also quite a fun woodworking
challenge to make, which I enjoyed. The side bearings are
removeable, and all the scope parts, including a wooden box to hole the
poles, fit in my Outback behind the back seat (NOT folded down).
In the first picture the mirror box vent flaps are open, exposing
the covered primary mirror. The flashlight hanging off the top of
the scope is my counterweight for now. A light shield attached to
the diagonal cage across from the focuser is used for observing, but is
not pictured here.
Another handy feature are the remote collimation rods, which allow
collimation to be done while looking in the focuser. The rods are
the wooden poles with a "T" handle at the top end and a 9/16" socket
that fits the collimation bolt at the other, and are located between
truss poles. At F/4, collimation is critical, and I usually tweak
it using a star or a moon of Jupiter. Then I can enjoy all the
delicious lunar and planetary detail that this scope can deliver.
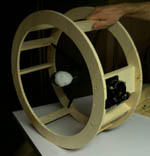
Here are photos of the hexagonal mirror box being glued up. The
mirror box is made of 3/4" poplar plywood, and the secondary cage is
1/2".
A biscuit joiner was used to cut biscuit slots in the edges of
the
6 pieces of the mirror box. This automatically aligned the edges
of
the sides, and all I had to do was apply glue quickly to all the
surfaces
and convince it to go together. This required lots of patience,
hammering,
clamping, cursing, and then more clamping. Finally the gaps were
all
closed, and the box was strong. A baffle sits in a dado a couple of
inches
down in to the top of the box, adding tremendous strength. (This
can
be seen in a later picture showing the top of the mirror box and the
pole
clamps.) In the next picture, the diagonal cage assembled for the
first
time, complete with AstroSystems spider and a FeatherTouch focuser, the
best
I have ever used. All my future scopes (F/6 and below) are
getting
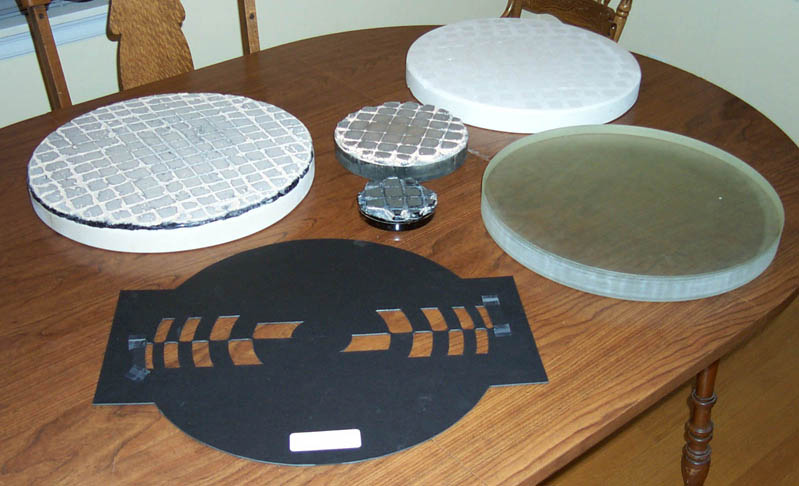
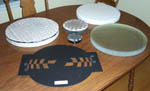
one of these! The third picture here is of the grinding tool,
polishing lap, two figuring laps and the test mask.

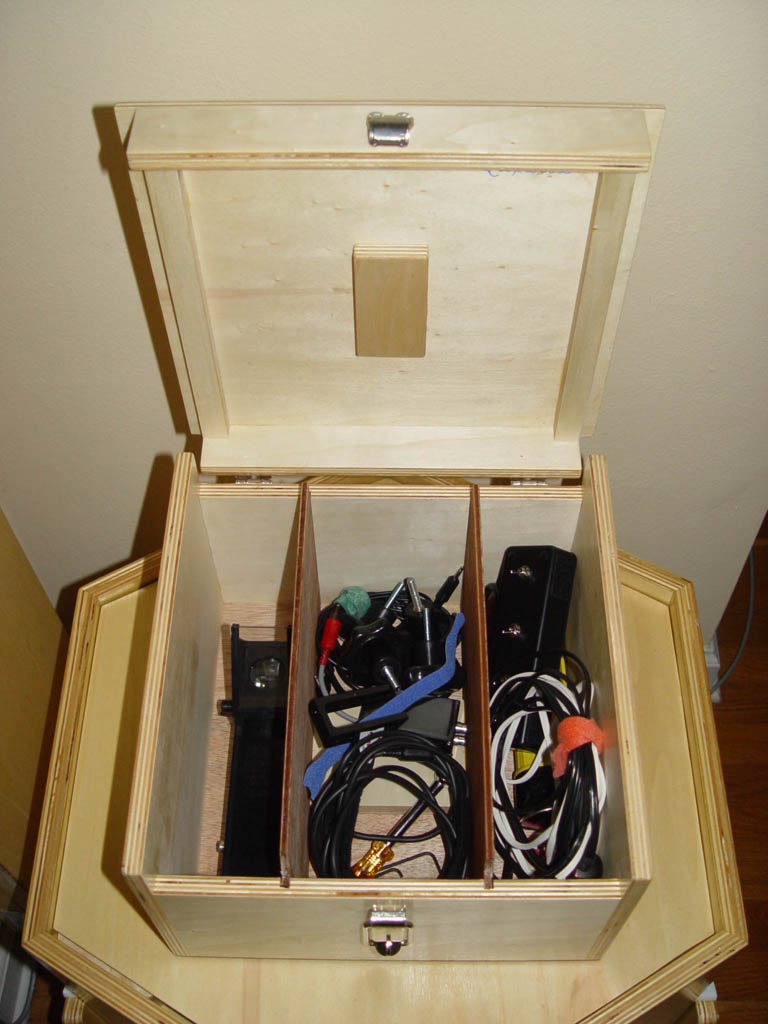
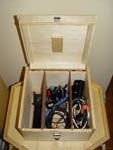
The first picture below shows the accessory box that holds the telrad,
electrical box and wiring, telrad heater, side bearing attachment
knobs, etc.
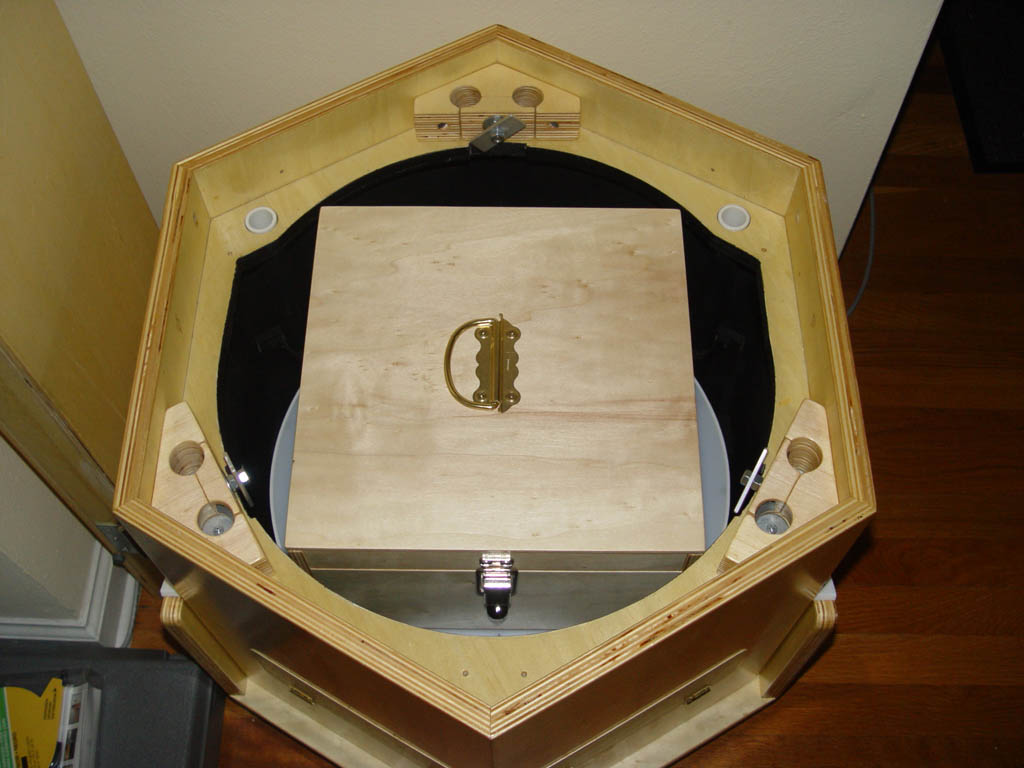
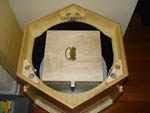
The next photo shows the top of the mirror box, with the accessory box
sitting on top of the mirror cover, as it does in storage mode.
The bottom of the box has a hole in it to accommodate the handle
for the mirror cover.. Note the white PVC pipe "guides" at the
upper right and left of the baffle in the mirror box. These pipes
guide the collimation rods down to the bolts with no danger of banging
against the mirror. The pole clamps were made from two
thicknesses of 3/4" poplar plywood, and the holes were carefully
drilled at the proper angles.
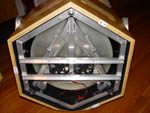
The third photo below is the back of the mirror cell, showing the dual
ventilation fans and the 6-point cell composed of three teeter-totter
supports with teflon pads. The cell is tringular, and moves as a
unit, so I never risk driving the mirror into the retaining clips,
since they move with
the mirror. The top cornter of the triangle is bolted to the
hexagonal
frame, but rubber washers allow the triangle to tilt and twist.
This
accommodates collimation movement, accomplished by the two bolts at the
bottom corners of the triangle, and driven by the user turning the
collimation
rods while looking down the focuser. All my one-person scopes in
the
future will have remote collimation knobs!
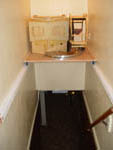
The last photo is of the scope in storage. I built a rolling cart
that rides on tracks above my basement stairway, which is just inside a
door leading to the driveway. I roll the cart out and the scope
can
be carried out the door and put in the car. To put it away, put
it
all back on the cart and roll the cart back so the stairs can be used.
It
makes good use of otherwise wasted space.
I modified my Telrad to be an electrical distribution center for this
scope, so I run a power wire up from the fan control box that gets
attached
with velcro to the mirror cell. This powers the secondary heater,
Telrad, and Telrad and eyepiece heaters. These heaters are all
capable of removing dew if necessary, and this often is necessary here
in humid Illinois.